Tuesday, July 30, 2013

Mother of the Bride Frustrations

I have this discussion all the time -

"Where do you shop for Mother of the Bride dresses, that don't look like bridesmaid dresses or grandmother dresses?"

Shopping for your MOB dress can be one of the most disheartening parts of the whole wedding planning. There just are not a lot of choices out there that don't look like a bridesmaid dress, show a little too much skin, are too 'poofy', too 'strapless' or bare, too short, too embellished, too 'suit-y", or just plain ugly.

Well, dear MOB's - fear not! You may or may not have thought of the idea that a custom made dress is not just a luxury of a by-gone-era, but a very real modern day convenience.
 There is a vast assortment of patterns out there that are more than suitable for MOB dresses. And the fabrics we have at our disposal today are unimaginable! You have your traditional silks and satins, of course, as well as the ever popular chiffon. But then there are your textured silks, brocades, printed and embellished chiffons, hammered satins, crepes, even some lovely linens,  and knits, including silk jersey, and of course an unlimited supply of gorgeous laces, in all colors of the rainbow, with sequins, or beading, or simply - lace.

I have been saving MOB patterns in my Pinterest board - here-
http://pinterest.com/candilouise/mob-patterns

These are just a very few - not really even touching the surface - of what is available. For more pattern idea's you can go  to http://voguepatterns.mccall.com/, or here: http://www.simplicity.com/ or here: http://www.marfy.it/?sl=EN
http://www.mccall.com/home.html ; or here:  http://www.simplicity.com/


These are just a few starting points. There are also patterns and ideas available on http://etsy.com
If your tastes run more towards vintage styles, you can find many great patterns here: http://evadress.com

With any of these patterns, it is usually not at all difficult to lengthen a short dress in to a long one, to add decorative embellishment where it is most needed, or change simple design details.

A dresses' beauty is found in the style lines, the flow of the fabric, and the fabric itself, but also in how the wearer feels in it. Don't settle for unsatisfactory dresses when you really don't have to!

Tuesday, July 23, 2013

Dear Bride: Why Yes! I Can!

"My dress is WAY too long, but it has a deep lace hem! Can you fix it?"
 
"I have a dress I love but it's about 5" too short! Can you fix it?"
 
"I found a dress really cheap- but it's about 5 sizes too big- can you make it fit me?"
 
"My dream dress is gorgeous! But it's a couple sizes too small. Can you help?"
 
The good news is - in most; not all, but most; cases, the answer is yes.
 
Deep lace hem?
 
 This deep lace hem was about 6 inches long. After measuring exactly how much it needed to be brought up, and pinning the extra length above the top row a lace -

 
 I carefully trimmed away and separated the bottom segment of lace and hem from the upper part of the skirt, cutting just above the top row of lace.
 
 
 This is the hardest part - re-pinning the lace that I removed, to the correct and level length. Not as easy as it looks. Then it is hand basted on before being machine stitched. If there is beading, it is usually all hand stitched.
 
 
 This is a gown that came in several sizes too small. I added a lace-up panel at the back, that the bride loved even more than the original zipper!
 
 
Here is a case of a dress that came in way too short! About 12 inches to be exact! Fortunately, I was able to get my hands on a sample dress with the same lace. After re-making the satin, crinoline and lining layers to the new length, I trimmed away the bottom 'trim' layer of the lace. I then very carefully removed about 15 inches from the bottom of the sample dress, and positioned in in place on the dress.
 
 
You can see the pins here, if you look closely! Hand basted, very carefully, to make sure it was all even and at the correct length; then machine stitched in place.
A challenge, to be sure- but can I tell you a secret? Shhhhh!!!
(The bride never knew! It was obvious when the dress arrived from the manufacturer, that it was much too short. In looking at her measurements, it was not difficult to figure how much length was needed, so I added it before she even saw it!)
 
There are many other alterations that can be performed on your wedding dress- including adding straps or even sleeves, adding or removing a petticoat, adding beading or other embellishments, and of course, my favorite - bustling! But that's another post!

Sunday, June 30, 2013

Pageant Beading

Pageant dresses are an item I haven't worked with very much in the past. A couple here and there, but never more that that. I guess I have been too busy with wedding gowns!
But recently, a pageant mom came to me needing assistance with 2 dresses. The first one was a no brainer - take up at the straps and in at the back. Rip, stitch, done.
The second dress had been purchased 2nd hand previously worn. Previously altered. Previously taken in. Mom was hoping that it could be let back out enough to fit her pageant daughter. No problem - it had just enough to let out to fit the young lady perfectly!
This dress also had beading at the shoulders and back that she wanted replicated at the hip/skirt line.
Here it is before (well, I forgot to do a before, so this is just as I had started working on the beading):
 
 And here it is after:
 
 
 Here is a close up of the beading:
 
 
The beading I used was 4mm pink swarvorski set in crystals, 2.5mm pink swarvorski set in crystals, silver palettes,and several sizes and types of crystal beads. All in all, I love the new look. It changed the entire look of the dress, giving it a much more modern and sophisticated look.

Saturday, June 22, 2013

For Jane . . .

The last post I made here was to share with you about a project coming up that I was so excited about.  Jane Wicker, Airshow performer, and Wingwalker, had asked me to make her a very special wing walking outfit for her upcoming marriage. The plan was for her and her fiance, to get married while wingwalking! I hadn't a clue how this was going to be done, but I had no doubt that Jane could do it!

Sadly, and tragically, this project will not be happening. Today, Jane was killed while performing her act at an airshow in Dayton, OH.

I have been involved in this business long enough to have lost several friends. It doesn't get any easier. But perhaps this one was a little tougher, because I had really just been getting to know Jane, and really really liked her.

Jane had given me some ideas of where she wanted to go with her wedding outfit, and I had some ideas of my own. Together we had come up with some really great stuff!

Jane was a huge fan of the era of the 'Roaring 20's'; probably because of the love she had for her airplane, Aurora. It was a huge old Stearman Bi-plane, built for that slow dancing in the sky, that she was so good at. She could dance across the wings of that airplane like nobody else! It was a priveledge to watch her and a priveledge to know her.

She had wanted an outfit that reflected the romance of that era, but was also conducive to her needs as a wing walker. This is what we came up with - only with long, fitted sheer sleeves with some bling at the cuffs. It was to have spattered bling across the shoulders and chest, at the high neck, and again in a thin belt at the midriff.
We talked about a seperate skirt of silk charmuese for the after party,as well.

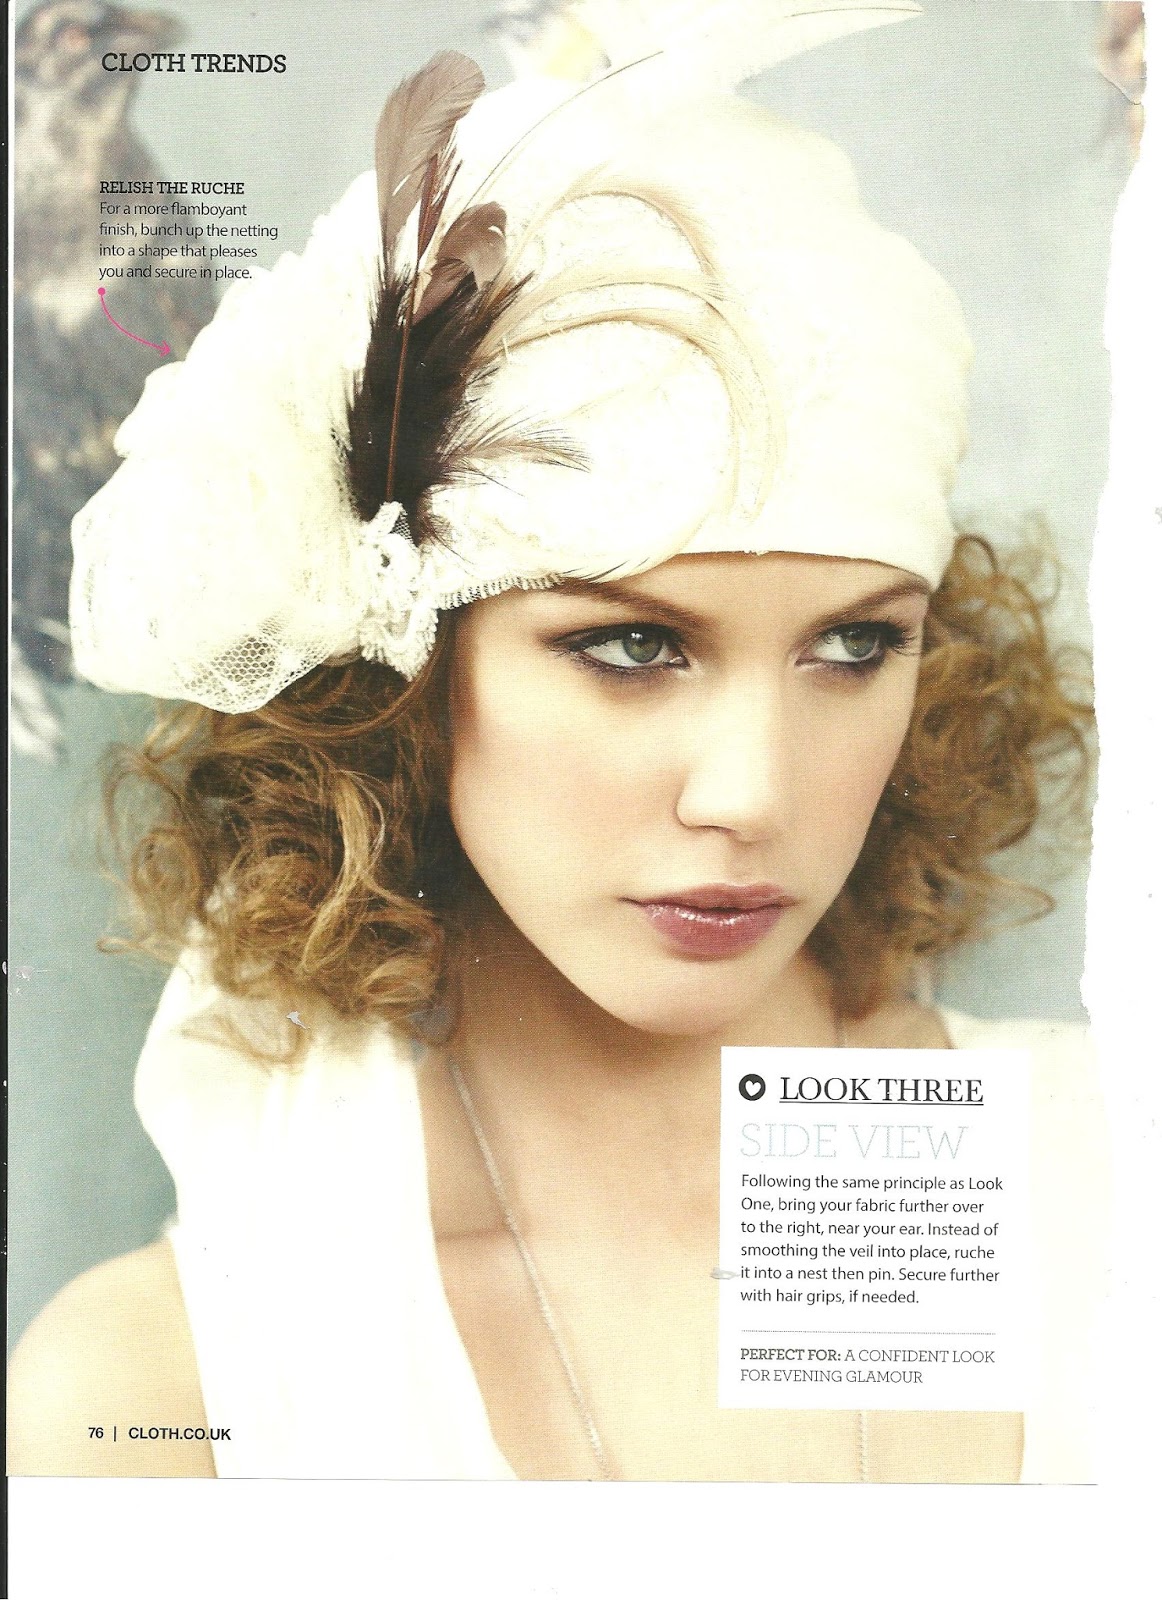
Instead of a veil, I was going to make her this  turban/hat - which we both fell in love with! Minus the feathers, though, and add some bling instead.
Though this lovely outfit will never be made, I will always see Jane in it; standing on the wing of Aurora, waving at the crowd, a huge ole' smile on her face as she does what she did so very well.

God Speed, and Blue Skies forever, Jane.Blue Skies Charlie & Jane!!


Sunday, June 9, 2013

A Dream Dress Becomes A Reality

Normally I wait until the bride takes possession of her dress before I post about it. But this time I simply can't wait! I won't post her name, though!
 
This bride came to me almost a year ago with the idea of a very simple dress for her beach wedding. Basically just a dressed up t-shirt dress. But she had another idea, and brought me a picture, of a gown that was her true dream dress. How much would it cost? Could I make it with just a couple changes? Absolutely! The biggest difference was that she wanted the main satin layers in a soft pink.
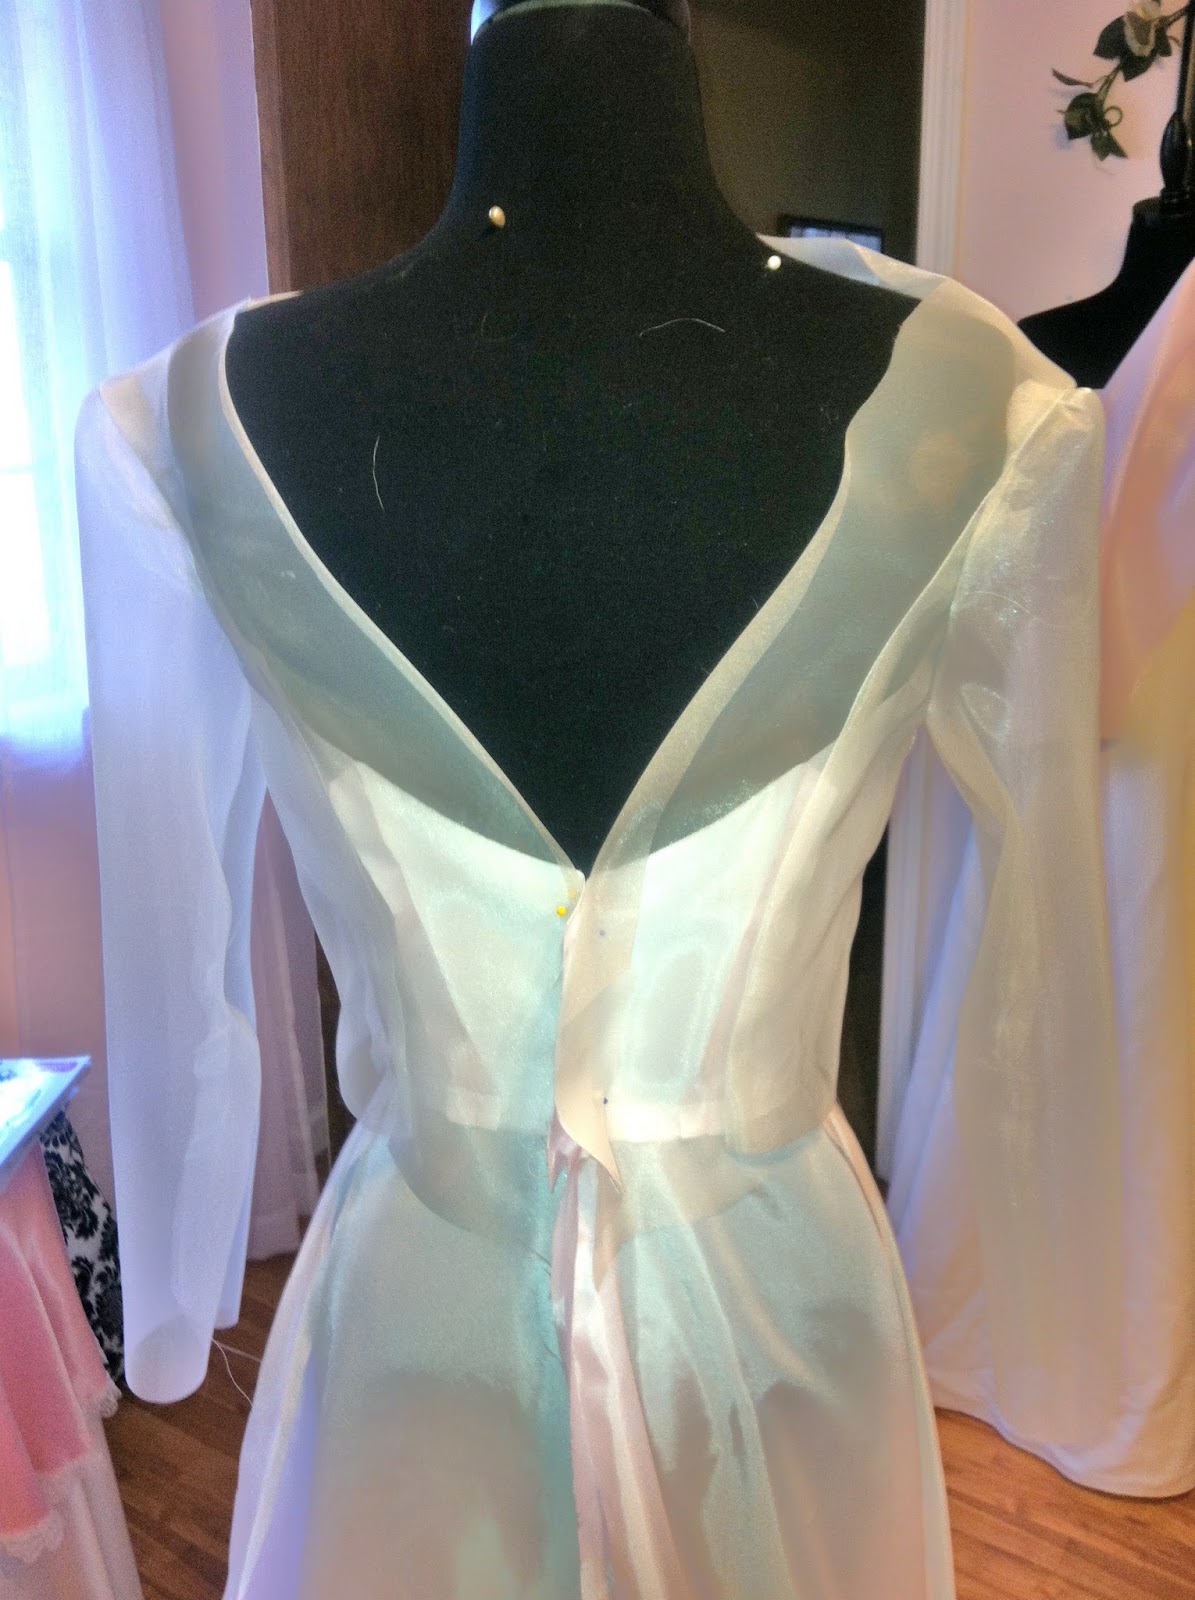
Initially, we talked about the over - blouse and skirt being done in white organza -
Front
 
Back
 
After the first fitting we decided to nix the organza and go with a mesh for the top, and tulle and Point d' Esprit for the skirt.

But there was still something missing, so we added the magic touch -
  A pink satin sash and bow.
 
It's not finished yet; still need to do some fitting on the top, add buttons at the back, and the hem. But my client is so excited, and so am I! I so love this dress! Can't wait to show you the final fitting! 


Wednesday, June 5, 2013

Another Vintage Re-Make

It seems to be my year for Vintage Re-makes! Here I will share with you about the second one of the year; although I started today on yet a third!

This gown is another 70's design, worn by the brides mother. You know the era - the full sleeves, high neck, gathered waist, lots of lace and ruffles around the neckline.


This dress will be unrecognizable when I am finished! The bride wants it totally re-made for her rehearsal dress. I will remove all that lace around the neck and bodice, remove the sleeves, take the skirt in, and shorten it. Then I will re-apply some of the lace around the now strapless bodice, and add thin sraps for support, as the dress has a pretty low back. Along the way I will need to add boning and a lining for structure. Whew! Right now it is a work in progress . . .  more to come!

Sunday, May 19, 2013

A Vintage Re-Make; Revisited

Several months ago I posted about a 1970 vintage wedding gown I was re-doing for a bride. Her mother had worn it and now she wanted it redone so she could wear it to her own wedding.

In working with these older dresses, I have found that they don't make dresses like they used to! A lot less structure, a lot less finishing. In remaking this dress, I first had to remove the sleeves and the lace ruffles on the bodice. I added a structured lining:
 I took the skirt in to create a more a-lined look, taking the gathers out of the back and replacing them with pleats. The lace was all replaced, and the beading began. Several days and many hours later, the bodice was beaded, front and back. Here is a veiw of the front, partially beaded:

And here is the back veiw:


After finishing, with adding buttons at the back, and straps (a last minute addition; they came over the shoulder and made a 'V' at the back.), and a traditional bustle, she finally picked it up a couple weeks ago. And - I simply cannot believe these are the only pictures I got! Mom and bride promised me pictures later, of both mom in the dress in the 70's, and the current bride in the same dress. I will not only post them here, but I will also be framing them and putting them in my sewing studio!