I don't even want to think about how long it has been since I last posted. I do know that the last couple years have been incredibly busy and fruitful. Many brides have walked through my door, as well as their mothers and bridesmaids.
I have also begun doing contract alterations work for a well known local bridal shop. They keep me very very busy!
It would be almost impossible to list and show all the lovely dresses I have been privileged to create in the past months; so I thought I would just show a quick slide show of my favorites!
Hope you enjoy looking as much as I enjoyed the creating!
This was a "Pretty in Pink" gown for a bride that had brought me a picture of a gown completely different form what we actually created. The only thing that really stayed the same from her original idea, was the color pink!
Some brides want lots of color! This bride did not want anything traditional! Red and black were her colors! Its actually a short red and black lace short sheath, with a removable over skirt of cascading ruffles. The short sheath was necessary for her departure ride - on a motorcycle! I put invisible zippers at the bottom of the side seams, that she could unzip for more freedom of movement.
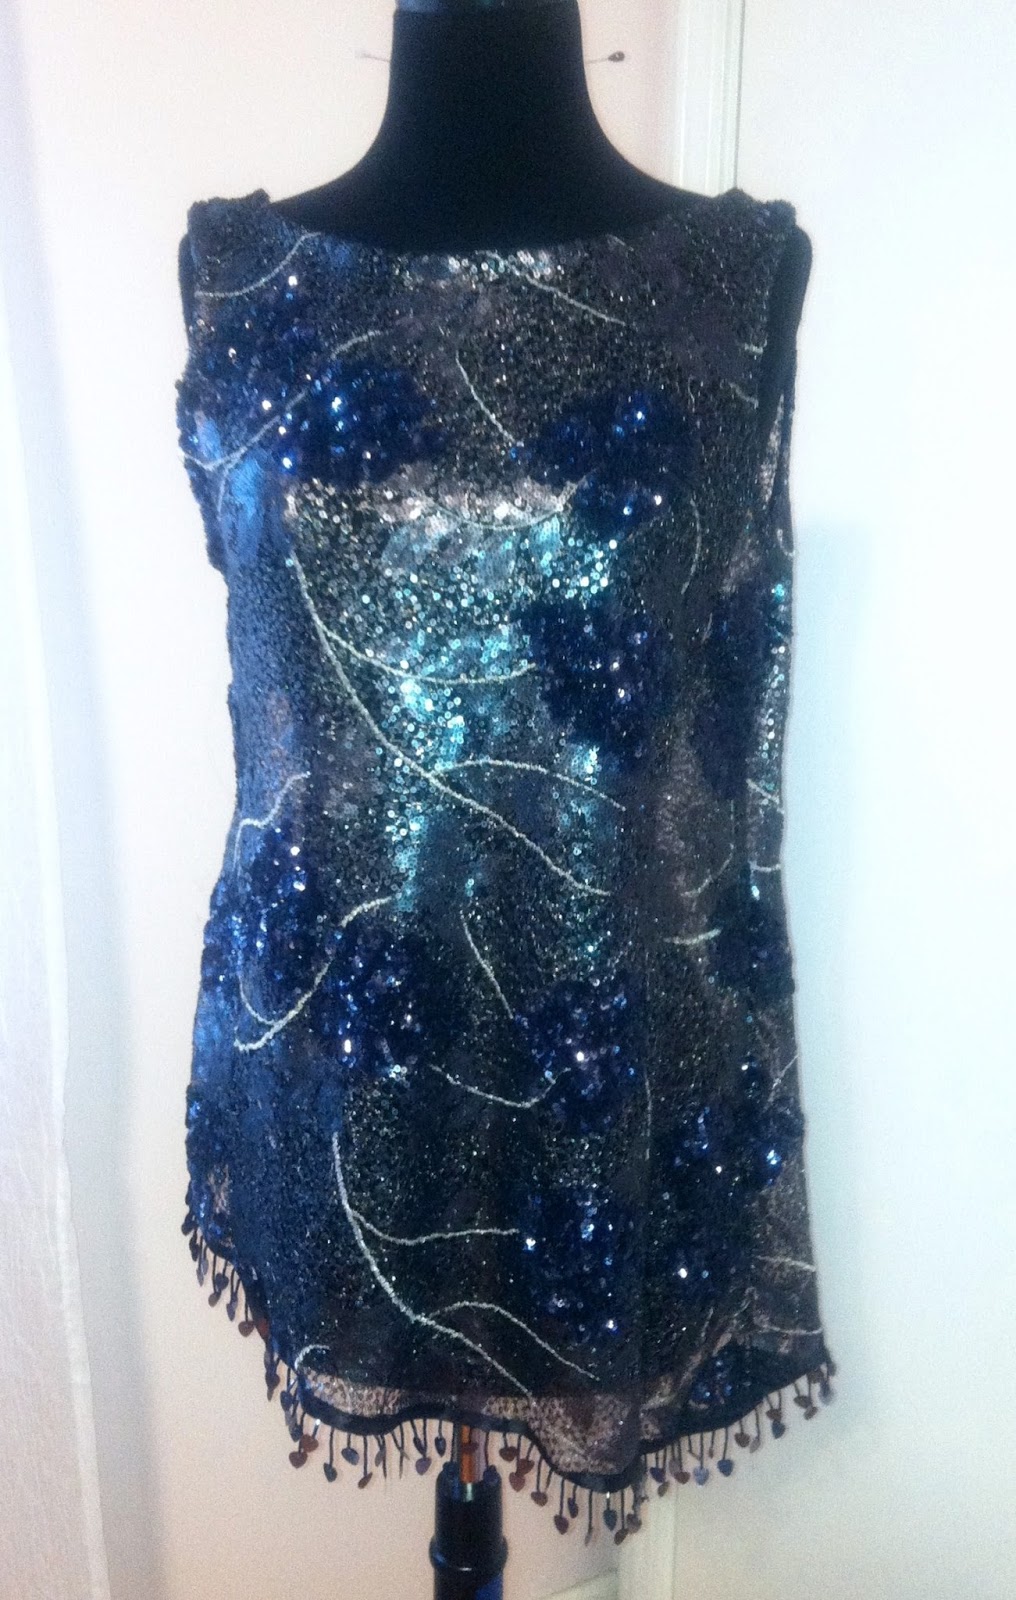
A very good friend asked me to make her a beaded tunic for a special occasion. Simple construction, but it turned out so beautiful! The asymmetrical hem is trimmed in a beaded fringe.
This was a purchased gown that had a very long train, which I cut off, and created this pretty back drape with cap sleeves, to cover the open back.
This sweet young lady needed a flower girl dress for the wedding she was attending. She was such a joy to work with! When she put on the finished dress, she teared up and said, "I am beautiful!"
In the first picture, here, you see a cathedral length gown that was worn several years ago by the bride, who brought it in to me ans asked that I take it apart and create 2 small flower girl dresses for her daughters, aged 18 months and 3 years.
Okay - so this is certainly not everything I have worked on in since I last posted, but it will give you, dear readers, a small taste of what I have been up to!
Next up - my recent fav's - both created and altered!
No nude pictures - sorry! If that is what you are looking for, well, you won't find it here.
Actually, this post is on my progress on the red dress. I'm just about done and will post final pics as soon as I am.
Over the weekend I worked diligently on the dress. I quickly found that it was much easier to sew (almost) naked than to strip, put the dress on for fitting, strip again, dress again, strip again, fitting again, etc . . . . than to just leave the clothes off. Nobody else was home to catch me in all my glory, so why not. It is surprising how little time it takes to start to feel 'comfortable' in your own skin! My biggest concern was that someone would happen to see me through the woods in our yard and then up through the second story window to the back of the sewing room. There are no curtains, after all.
I took Saturday off to spend with a friend, but by Sunday afternoon I had the lining sewn and attached; making an invisible hem with a 1/2 inch horse hair braid added to give the bottom of the skirt a little more body. Here is what it looks like on the outside -
And this is the inside view -
The 1/2 inch horse hair braid is sewn and hidden inside. The skirt lining will be hand sewn to the bodice -
Then on Monday I made the foundation. Basically a hip length bodice with boning that attaches at the bodice top and back. It is tacked down at the seams at waist level. I've got the foundation attached at this point, but forgot to take pictures; I will do so probably after Thanksgiving. I've attached the foundation at the top of the bodice, but not at the zipper or tacked at the waist. I have decided I need to make sure it will zip before I go any further. Normally, with a fitted garment such as this one, I've had either my youngest daughter, or my husband to help with fitting. My daughter moved out over a year ago, and my husband has been overseas for, well, way too long. He is supposed to be home late tomorrow afternoon. But that is another story. I digress . . .
With nobody here to help me with fitting, I have been doing the best I can. I believe it will zip, but since I can't do it myself, I am hesitant to finish it till I know for sure. So, tomorrow I am going to bring it with me to the bridal shop that I do alterations for. I will have Pennie zip it for me, or not(!) and go from there. I am actually able to zip it all but the last 2 inches or so, and that only because I simply can't reach.
So, until tomorrow - or probably Friday, since my husband gets home tomorrow and then it's Thanksgiving.
So - Happy Thanksgiving all - and Happy Sewing!
Believe it or not - I actually remembered to take a few photo's of my progress to day on my Red Dress. First, I spent a couple hours marking with tailor's tacks, all the darts and new seam lines. It shouldn't have taken so long, but I had help from my assistant.
Another hour later and I had the organza underlining attached and was ready to start putting it together.
I had found a pretty piece of gunmetal colored lace with silver threading in it that I wanted to use in the bodice. Originally I had thought to use a piece of black lace I had, but decided it was too harsh. This gunmetal color is more subtle and just looks better.
So far, it seems to be going together very well. The pattern is vintage, and I am not used to sewing vintage patterns. I was surprised to see in the instructions that it only calls for a bodice lining! I am making some changes to the foundation structure. I am giving this gown a full lining, as well as an attached structured foundation that will fall to the hips. Since there is no waist seam, I don't want the foundation to end at the waist, thereby giving me a very noticeable crease at the waist. I added twill tape to the top of the bodice -
to stabilize it. With the curved edge, I don't want it to fall away from my chest. The tape should stabilize it enough to prevent that.
Tomorrow I will finish attaching the back and the bottom of the skirt,as well as the lining. Hopefully I will have time to atleast get started on the foundation.
So far so good!