Sunday, May 19, 2013

A Vintage Re-Make; Revisited

Several months ago I posted about a 1970 vintage wedding gown I was re-doing for a bride. Her mother had worn it and now she wanted it redone so she could wear it to her own wedding.

In working with these older dresses, I have found that they don't make dresses like they used to! A lot less structure, a lot less finishing. In remaking this dress, I first had to remove the sleeves and the lace ruffles on the bodice. I added a structured lining:
 I took the skirt in to create a more a-lined look, taking the gathers out of the back and replacing them with pleats. The lace was all replaced, and the beading began. Several days and many hours later, the bodice was beaded, front and back. Here is a veiw of the front, partially beaded:

And here is the back veiw:


After finishing, with adding buttons at the back, and straps (a last minute addition; they came over the shoulder and made a 'V' at the back.), and a traditional bustle, she finally picked it up a couple weeks ago. And - I simply cannot believe these are the only pictures I got! Mom and bride promised me pictures later, of both mom in the dress in the 70's, and the current bride in the same dress. I will not only post them here, but I will also be framing them and putting them in my sewing studio!


Wednesday, March 13, 2013

Beautiful Nightmare

Prom season. That kind of says it all, doesn't it?

This year it's large jeweled beading, lots of chiffon and bright colors.
A new dress shop has opened in the area and has brought me more Prom business than ever! Which is good - I can't complain! In fact,I will soon be turning people away for the April Proms, as I simply have too many dresses and haven't room or time for  any more!

Today was one of those days - working on a prom dress - that I hate. Now, usually I love my work. Most of the time I love my work! But today . . .

I met with a very sweet and mature young lady yesterday, who brought me her prom dress that  she had paid for herself (and spent a very pretty penny on). Her prom is one of the earliest this year, in March. So, I knew I had to get it done quickly, to stay on schedule with all the other lovely ladies waiting in storage. I gave her a quote on the price and sent her on her way. I got the dress out this morning, planning to spend most of the day on it. Lots of that jeweled beading at the bodice, where it needed taking in, and lots of layered chiffon at the hem.


4 hours later I was still working on the beading. 


Once I started on the hem I got another surprise. I knew there was 3 layers; one of a lining, 2 chiffon. First, the lining. 6 yards around. 2 hours. Next, the first chiffon layer. 3 hours, 9 yards around. Last layer (finally!) of chiffon. Almost 4 hours - 15 yards!!! One layer - 15 yards!!!
I ran out of pins in working on it, had to raid another dress hanging in storage for more!

When all was said and done I spent over 12 hours on this dress, that I fully expected to take no more than 6.

A Beautiful Nightmare.

Saturday, February 9, 2013

Bead One, Sequin Two, Bead One, Sequin Two . . .

My bride wanted her mothers Vintage Gown re-made to look more modern for her May wedding. After removing the big puffy sleeves, reducing the volume of the skirt and adding a structured bodice lining, it was time to reattach the vintage lace and begin beading.


But first, It was necessary to sort through all my beads. She didn't want any silver or rhinestones, just clear, white and pearls. So I got busy . . .


Who knew there were so many different colors of pearls! I now have containers of white pearls, yellow pearls, ivory pearls, pink pearls, and even tan pearls!

After spending a good 5 or 6 hours sorting (yes, I had that many to go through with a tweezers, to separate), I finally got started beading the bodice. Here is what it looked like after 5 hours -


And here is another 5-6 hours later . . . .
FRONT BODICE
BACK BODICE
I just have to finish the beading on the front of the bodice and I will be done.  Probably another 6- 10 hours. The first few hours were killing my back, but I learned quickly to get up and stretch every 45 minutes or so! I am liking how it is turning out - I hope the bride does too!!

Thursday, February 7, 2013

A Vintage Re-Make

Last fall a lovely bride came to me with her mother's wedding gown from, well, lets just say, a certain era. That one that some of us remember better than others. Those big skirts, the big sleeves, lots of lace, and of course, the big hair!

The dress fit her quite well. if you could get around the big sleeves and skirt. Mom and daughter both had a pretty good idea of what they were looking for; remove the sleeves and make it strapless, reduce some of the fullness from the full gathered skirt, remove the lace 'tail' at the back, and maybe add some beading.

I had my bride put it on, leaving the sleeves off, so we could get a picture of how it might look.

Notice the gathering at the waistline; it made her look pretty bulky (and she's not), and the gathers at the back were even worse!


The first thing I did was to remove the sleeves, them take the skirt in at the sides; removing all the gathers at the front, and exchanging gathers at the back for pleats.


At her next fitting, the skirt fit perfectly, and we were ready to go ahead with re-creating then bodice. Being that it was made back in the 70's, it was made with no lining. I have found that in many dresses made in that era, this was the norm. Fascinating . . . 

Now it was time to make a lining for the bodice, with structure for the new strapless design.


Next up - beading!!!

Wednesday, February 6, 2013

Aplologies and A New Start!

Apologies, apologies, apologies. I had no idea it had been THAT long since I've posted a blog entry. All I can say in my defense is that 2012 was a VERY busy year! I usually have a month in the summer and atleast one more in the fall/winter that I can play catch - up and relax a bit. Never happened in 2012. I forgot how to relax, I forgot what I did in my spare time. If I wasn't sewing, I was trying to keep up with cleaning and laundry and just living. But no more! It is a new year and I have made a resolution to be more active on my blogging, and in my social life!

And on that little note, stay tuned for more blogging!

Friday, May 18, 2012

Pretty In Pink!

A few months ago, I had a new client come to me. It was the usual request, with a twist.

This client is a more 'mature' bride, at 65. She will be getting married for the second time, and didn't want the traditional dress or gown, especially at her age. She had an idea in  mind of exactly what she wanted; so with pencil in hand, I drew out her ideas onto paper.

What she had in mind was  tea length, full skirted, princess seamed, with no waist seam, slight sweet-heart neckline, with a sheer (chiffon) overlay with a high neck and 3/4 sleeves. She wanted it made in a soft pink with the neck, sleeves and hem trimmed in light beading.

The lining is a Bemburg lining; and the bodice of the lining is underlined with a cotton/poly that is also interfaced. This layer forms the foundation with sewn in bra cups and boning at all the seams, that end at the hip line, to reduce any creasing at the waist.  A crinoline is attached at the hipline to the foundation. The main layer of the dress is a crepe back satin. Because it is such a fluid fabric, I underlined it with a very lightweight cotton batiste to give it a little more body. Finally, is the very lightweight, breezy chifffon. The skirts hem is finished with a horsehair braid that is sewn between the crepeback satin and the batiste. The neckline, sleeve hem, and skirt hem are all trimmed in a bugle beaded trim.

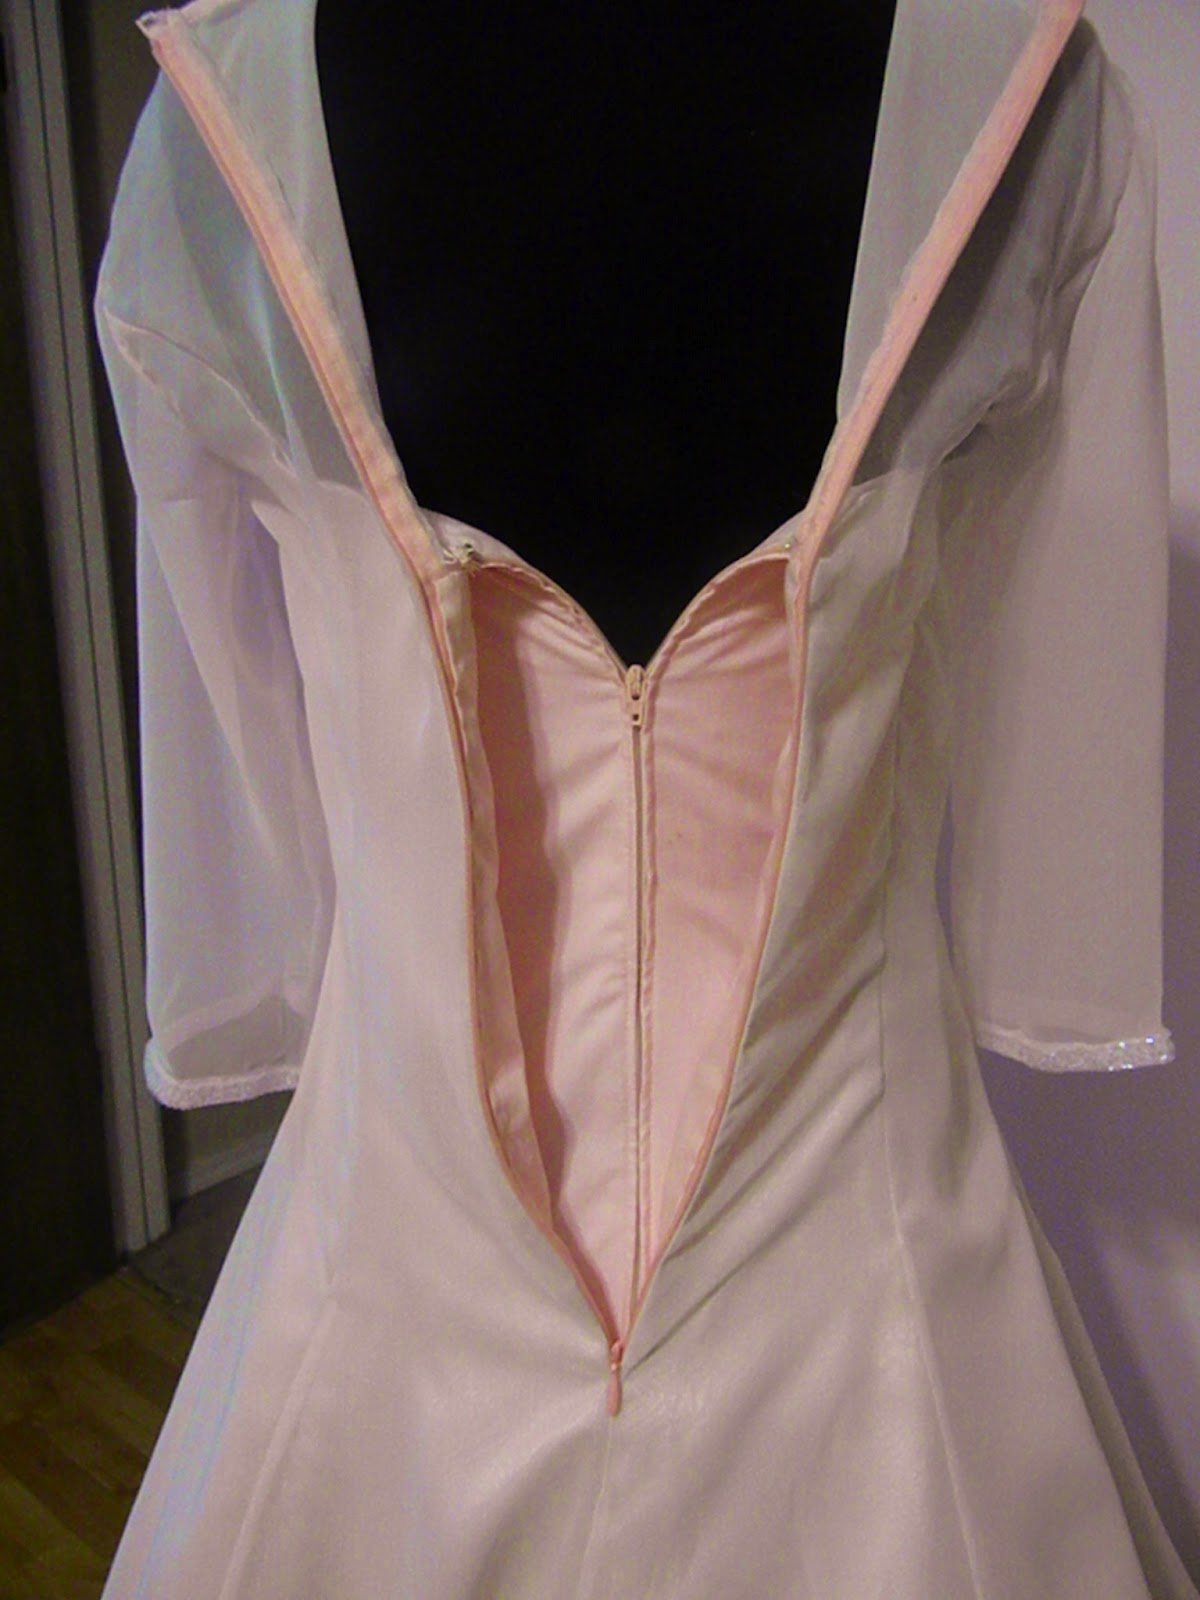
The only part that really gave me trouble (and it REALLY gave me trouble!) was the back zipper. There are actually 2 back zippers; one for the foundation, and an outer one for the dress. The foundation zipper was a no-brainer. But the outer zipper had to go from the hip to the neck, where as the foundation zipper only had to go from the hip to the mid back. Where the foundation/lining layers met the outer layers is where I struggled. Here are a couple pictures to try and explain -

Here, you can see the foundation zipper underneath, and the outer zipper which goes all the way up the back.

In this picture, I have pulled the skirt up in back to reveal the foundation and crinoline. The lining is attached at the top of the bodice, on the inside of the foundation.

                     Here, you can just see the slight beading at the neckline and sleeves.


                                                 And, finally, the completed dress!

After fighting for almost a whole day with those confounded zippers, I was ready to pull my hair out, as well as stressing about whether it was going to fit properly. My client hadn't been able to come in that day for a fitting, and being pinched for time, I decided to trust my measurements as well as my instincts, and 'go with it'!

The next morning, she came in and put it on. I almost cried when it fit her to perfection! She loves it - and looks beautiful in it, as all brides should! All I had left to do was the beading and adding a bit of fullness to the crinoline. It now just needs to be steamed before she picks it up on Monday.

Another Happy Bride!!

Friday, April 13, 2012

Beading, beading, and more beading . . .

It's been a while since I've posted here, only because, well, I've been a bit busy. It is high season for Bridal alterations, and though I am learning to pace myself better than years past, my days are still very full.

Embellishments seem to be the thing this year, and at the top of the list is beading. Lots of beading. I have done several dresses that have bodices covered in beading. Covered. As in, no fabric to show through. Lots of work, but even when you are finished taking in  a heavily beaded gown, it really looks no different from the original.

This dress was different. 

The bride chose a lovely gown from
 Essence of Australia, with a fully beaded                   
bodice and straps, cumberbund waist, and
 full, pleated taffeta skirt.


The back, though cut low, also had the beaded
straps for coverage. 


The back of the bodice fit quite well, but the front of the bodice was about an inch too wide across the breast width. Pulling it in in the center
seemed to fix the problem, so (and bless beading for it's forgive-ness!)
I took about an inch wide dart right down the center front, from the top of the bodice to the waist.

She also wanted to get rid of the straps completely.

4 hours of alteration work, and 6 hours of bead work later, and this is how it now looks!
                                                         
Front of bodice
Back of Bodice


It's fun to do a dress where you can actually see the difference a few hours of work can make!