Saturday, August 31, 2013

Beautiful Brocade

As I have mentioned at least a couple times in previous posts, Mother of the Bride/Groom dresses are almost impossible to find. That is unless you want to look like one of the bridesmaids, or the grandmother. Which is not a bad thing, just not necessarily what most fashionable mothers want to look like!

Because of this glut (is that a word??) in bridal wear marketing, I have been finding myself working with more and more mothers to create their attire for this special event. This week I have been working on just such a project. It is quickly becoming one of my more pleasurable creations, for several reasons! 1) the fabric is so lovely! It is a gorgeous green and blue turquoise paisley with silver and gold accenting. Though it ravels terribly, it is so pretty that I don't really mind the extra work!  2) The pattern, though not difficult, is not your usual slap together the matching seams kind of pattern. I am actually needing to read the pattern directions! Can't tell you how long it's been since I've had to do that! It's just enough of a challenge to keep it interesting. 3) The lovely lady I am creating the dress for is fun and entertaining, with definite ideas of what she wants, interesting stories and a sense of humor.

Yesterday I spent several hours cutting the fabric out; it shouldn't have taken so long, but I found myself about 6 inches short of what I needed, and it was a bit of a challenge to rearrange, adjust and re-align the pattern pieces to all fit. After our first fitting, this afternoon, I got busy sewing.

The pattern is a Retro Butterick:
http://butterick.mccall.com/b4919-products-5273.php?page_id=371

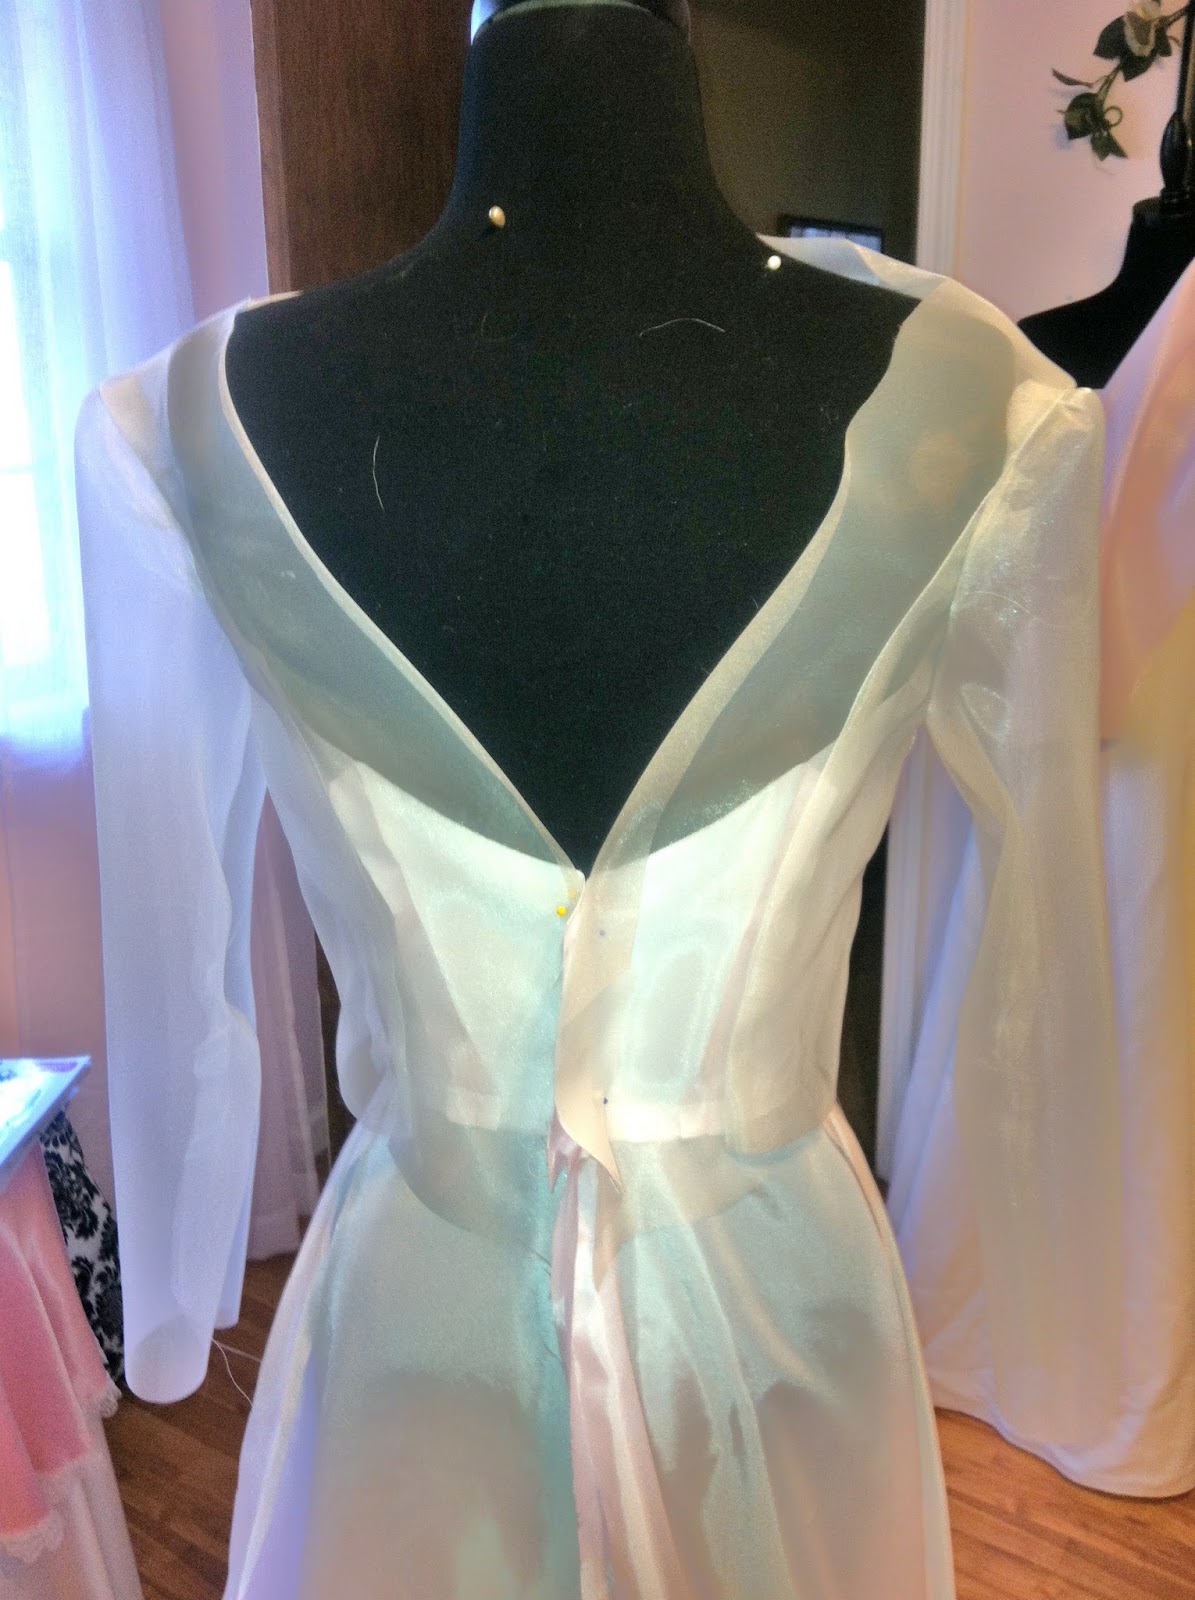
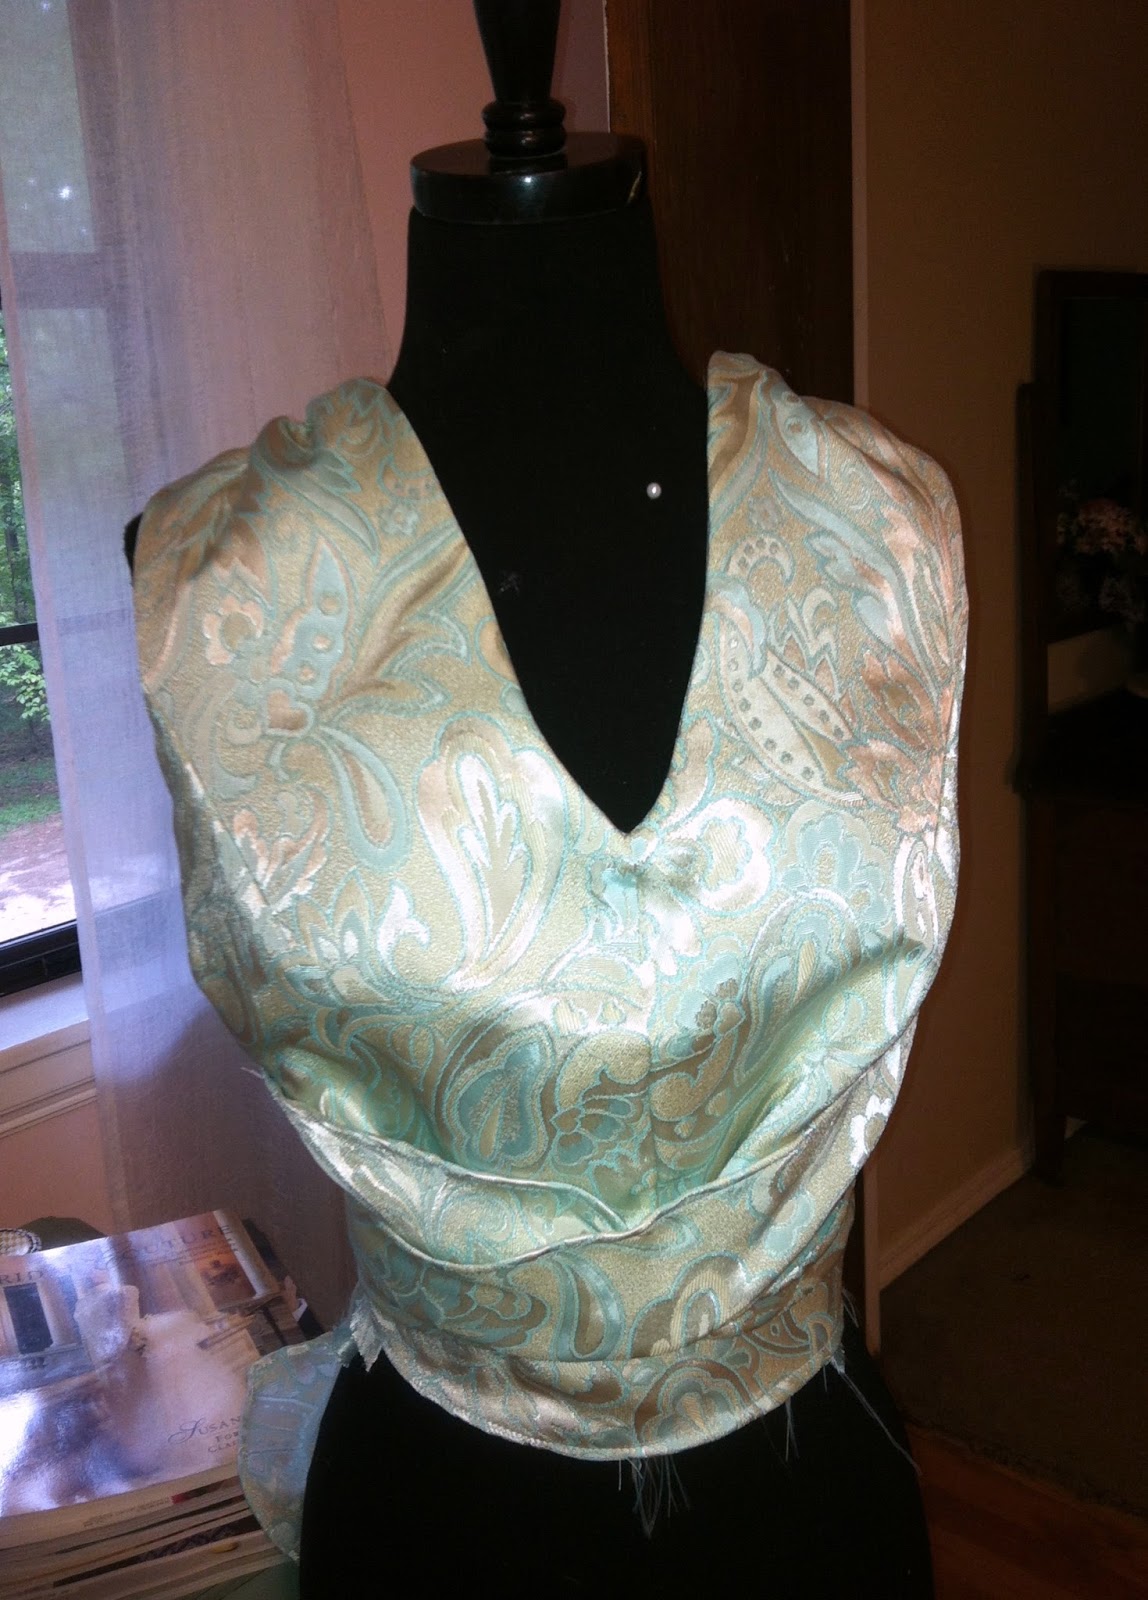
Today I was able to finish the bodice:
                                                                      Bodice Front

Bodice Back
(minus the zipper!)
 
The front needed a little tweaking (added side darts and reduced some of the volume across the front). Tomorrow I will attach the skirt and the zipper; then will wait til our next fitting to measure for the hem.
 
The skirt panel are ready to be sewn together and sewn to the bodice. One of the most enjoyable parts to my sewing today was finishing the skirt seams! I used a green turquoise silk shantung for both the bodice lining and the Hong Kong seam finish.
 
 
I do love a pretty Hong Kong finish!!

Friday, August 9, 2013

Too Short Wedding Gown

Today's project: adding length to a too short wedding gown.

Not as difficult as it might sound - at least with this gown. It has a 1.5" wide ruffled organza trim at the hemline; so we decided to just add another layer of the ruffled organza. The gown is about 1.5" too short, so after some careful measuring, I figured out I needed to cut 14 yards of 3.5" wide strips of ivory organza. To make the whole process easier, I decided to cut the 14 yards in 1 yard increments, gather them individually, and then sew the ends together. But before I could gather them, one long edge had to be very slightly frayed, to match the existing hemline. Several hours later . . . .

After ruffling each strip, I gathered then pressed each piece -
 
Tomorrow I will sew the ends of all these strips together, then attach them at the hem. Here, you can see both the original length, and how the new ruffle will add just the right amount!
 
 
And here, you can see how pretty the new hem will look when completed. Ignore those pesky threads - they will magically disappear when it's finished!
 
 
Such a lovely gown! Can't wait for the bride to see the finished project!


Monday, August 5, 2013

An Un-Recognizable Vintage Re-Make

 
When Jessica brought me her mother's 1970 something vintage wedding gown, and told me what she wanted to do with it, part of me was appalled! But, another part of me was very intrigued!
This gown was one of those very dated wedding gowns - lots of wide lace at the high neck, big sleeves, you catch my drift, right?


The fabric had aged to a wonderful candlelight pantina - just beautiful! I was in love with the lace at the neckline, cuffs and hem. Absolutley gorgeous!
 
 
But it was hardly a modern girls dream dress. Jessica had actually already purchased her wedding gown, and wanted this vintage gown of her mothers' made into her rehearsal dinner dress. She wanted to use the lace and the original fabric to create a completley new dress.
So....
I removed the bodice lace. Removed the sleeves. Removed the skirt. Basically took it apart and started from scratch. Re-made the bodice into a strapless; cut and re-shaped the skirt into a fitted mini; added that gorgeous lace around the bodice neckline. We decided it needed thin straps for support, as well as the additional foundation I added (it amazes me that these vintage gowns have NO foundation , let alone a lining to most of them!). Some tweaking here, some adjustment there, and
 YA-LAW!!!
 
 
Amost completley un-recognizable! Jessica is a very tiny girl, so the final dress does not fit on my dress form, and I didn't think to get a final photo of it on her :(
 
The lace is still gorgeous, the fabric is still that lovely candlelight color. But the dress is so completley different! Just goes to show what you can do with a little creativity!


Tuesday, July 30, 2013

Mother of the Bride Frustrations

I have this discussion all the time -

"Where do you shop for Mother of the Bride dresses, that don't look like bridesmaid dresses or grandmother dresses?"

Shopping for your MOB dress can be one of the most disheartening parts of the whole wedding planning. There just are not a lot of choices out there that don't look like a bridesmaid dress, show a little too much skin, are too 'poofy', too 'strapless' or bare, too short, too embellished, too 'suit-y", or just plain ugly.

Well, dear MOB's - fear not! You may or may not have thought of the idea that a custom made dress is not just a luxury of a by-gone-era, but a very real modern day convenience.
 There is a vast assortment of patterns out there that are more than suitable for MOB dresses. And the fabrics we have at our disposal today are unimaginable! You have your traditional silks and satins, of course, as well as the ever popular chiffon. But then there are your textured silks, brocades, printed and embellished chiffons, hammered satins, crepes, even some lovely linens,  and knits, including silk jersey, and of course an unlimited supply of gorgeous laces, in all colors of the rainbow, with sequins, or beading, or simply - lace.

I have been saving MOB patterns in my Pinterest board - here-
http://pinterest.com/candilouise/mob-patterns

These are just a very few - not really even touching the surface - of what is available. For more pattern idea's you can go  to http://voguepatterns.mccall.com/, or here: http://www.simplicity.com/ or here: http://www.marfy.it/?sl=EN
http://www.mccall.com/home.html ; or here:  http://www.simplicity.com/


These are just a few starting points. There are also patterns and ideas available on http://etsy.com
If your tastes run more towards vintage styles, you can find many great patterns here: http://evadress.com

With any of these patterns, it is usually not at all difficult to lengthen a short dress in to a long one, to add decorative embellishment where it is most needed, or change simple design details.

A dresses' beauty is found in the style lines, the flow of the fabric, and the fabric itself, but also in how the wearer feels in it. Don't settle for unsatisfactory dresses when you really don't have to!

Tuesday, July 23, 2013

Dear Bride: Why Yes! I Can!

"My dress is WAY too long, but it has a deep lace hem! Can you fix it?"
 
"I have a dress I love but it's about 5" too short! Can you fix it?"
 
"I found a dress really cheap- but it's about 5 sizes too big- can you make it fit me?"
 
"My dream dress is gorgeous! But it's a couple sizes too small. Can you help?"
 
The good news is - in most; not all, but most; cases, the answer is yes.
 
Deep lace hem?
 
 This deep lace hem was about 6 inches long. After measuring exactly how much it needed to be brought up, and pinning the extra length above the top row a lace -

 
 I carefully trimmed away and separated the bottom segment of lace and hem from the upper part of the skirt, cutting just above the top row of lace.
 
 
 This is the hardest part - re-pinning the lace that I removed, to the correct and level length. Not as easy as it looks. Then it is hand basted on before being machine stitched. If there is beading, it is usually all hand stitched.
 
 
 This is a gown that came in several sizes too small. I added a lace-up panel at the back, that the bride loved even more than the original zipper!
 
 
Here is a case of a dress that came in way too short! About 12 inches to be exact! Fortunately, I was able to get my hands on a sample dress with the same lace. After re-making the satin, crinoline and lining layers to the new length, I trimmed away the bottom 'trim' layer of the lace. I then very carefully removed about 15 inches from the bottom of the sample dress, and positioned in in place on the dress.
 
 
You can see the pins here, if you look closely! Hand basted, very carefully, to make sure it was all even and at the correct length; then machine stitched in place.
A challenge, to be sure- but can I tell you a secret? Shhhhh!!!
(The bride never knew! It was obvious when the dress arrived from the manufacturer, that it was much too short. In looking at her measurements, it was not difficult to figure how much length was needed, so I added it before she even saw it!)
 
There are many other alterations that can be performed on your wedding dress- including adding straps or even sleeves, adding or removing a petticoat, adding beading or other embellishments, and of course, my favorite - bustling! But that's another post!

Sunday, June 30, 2013

Pageant Beading

Pageant dresses are an item I haven't worked with very much in the past. A couple here and there, but never more that that. I guess I have been too busy with wedding gowns!
But recently, a pageant mom came to me needing assistance with 2 dresses. The first one was a no brainer - take up at the straps and in at the back. Rip, stitch, done.
The second dress had been purchased 2nd hand previously worn. Previously altered. Previously taken in. Mom was hoping that it could be let back out enough to fit her pageant daughter. No problem - it had just enough to let out to fit the young lady perfectly!
This dress also had beading at the shoulders and back that she wanted replicated at the hip/skirt line.
Here it is before (well, I forgot to do a before, so this is just as I had started working on the beading):
 
 And here it is after:
 
 
 Here is a close up of the beading:
 
 
The beading I used was 4mm pink swarvorski set in crystals, 2.5mm pink swarvorski set in crystals, silver palettes,and several sizes and types of crystal beads. All in all, I love the new look. It changed the entire look of the dress, giving it a much more modern and sophisticated look.

Saturday, June 22, 2013

For Jane . . .

The last post I made here was to share with you about a project coming up that I was so excited about.  Jane Wicker, Airshow performer, and Wingwalker, had asked me to make her a very special wing walking outfit for her upcoming marriage. The plan was for her and her fiance, to get married while wingwalking! I hadn't a clue how this was going to be done, but I had no doubt that Jane could do it!

Sadly, and tragically, this project will not be happening. Today, Jane was killed while performing her act at an airshow in Dayton, OH.

I have been involved in this business long enough to have lost several friends. It doesn't get any easier. But perhaps this one was a little tougher, because I had really just been getting to know Jane, and really really liked her.

Jane had given me some ideas of where she wanted to go with her wedding outfit, and I had some ideas of my own. Together we had come up with some really great stuff!

Jane was a huge fan of the era of the 'Roaring 20's'; probably because of the love she had for her airplane, Aurora. It was a huge old Stearman Bi-plane, built for that slow dancing in the sky, that she was so good at. She could dance across the wings of that airplane like nobody else! It was a priveledge to watch her and a priveledge to know her.

She had wanted an outfit that reflected the romance of that era, but was also conducive to her needs as a wing walker. This is what we came up with - only with long, fitted sheer sleeves with some bling at the cuffs. It was to have spattered bling across the shoulders and chest, at the high neck, and again in a thin belt at the midriff.
We talked about a seperate skirt of silk charmuese for the after party,as well.

Instead of a veil, I was going to make her this  turban/hat - which we both fell in love with! Minus the feathers, though, and add some bling instead.
Though this lovely outfit will never be made, I will always see Jane in it; standing on the wing of Aurora, waving at the crowd, a huge ole' smile on her face as she does what she did so very well.

God Speed, and Blue Skies forever, Jane.Blue Skies Charlie & Jane!!


Sunday, June 9, 2013

A Dream Dress Becomes A Reality

Normally I wait until the bride takes possession of her dress before I post about it. But this time I simply can't wait! I won't post her name, though!
 
This bride came to me almost a year ago with the idea of a very simple dress for her beach wedding. Basically just a dressed up t-shirt dress. But she had another idea, and brought me a picture, of a gown that was her true dream dress. How much would it cost? Could I make it with just a couple changes? Absolutely! The biggest difference was that she wanted the main satin layers in a soft pink.
Initially, we talked about the over - blouse and skirt being done in white organza -
Front
 
Back
 
After the first fitting we decided to nix the organza and go with a mesh for the top, and tulle and Point d' Esprit for the skirt.

But there was still something missing, so we added the magic touch -
  A pink satin sash and bow.
 
It's not finished yet; still need to do some fitting on the top, add buttons at the back, and the hem. But my client is so excited, and so am I! I so love this dress! Can't wait to show you the final fitting! 


Wednesday, June 5, 2013

Another Vintage Re-Make

It seems to be my year for Vintage Re-makes! Here I will share with you about the second one of the year; although I started today on yet a third!

This gown is another 70's design, worn by the brides mother. You know the era - the full sleeves, high neck, gathered waist, lots of lace and ruffles around the neckline.


This dress will be unrecognizable when I am finished! The bride wants it totally re-made for her rehearsal dress. I will remove all that lace around the neck and bodice, remove the sleeves, take the skirt in, and shorten it. Then I will re-apply some of the lace around the now strapless bodice, and add thin sraps for support, as the dress has a pretty low back. Along the way I will need to add boning and a lining for structure. Whew! Right now it is a work in progress . . .  more to come!

Sunday, May 19, 2013

A Vintage Re-Make; Revisited

Several months ago I posted about a 1970 vintage wedding gown I was re-doing for a bride. Her mother had worn it and now she wanted it redone so she could wear it to her own wedding.

In working with these older dresses, I have found that they don't make dresses like they used to! A lot less structure, a lot less finishing. In remaking this dress, I first had to remove the sleeves and the lace ruffles on the bodice. I added a structured lining:
 I took the skirt in to create a more a-lined look, taking the gathers out of the back and replacing them with pleats. The lace was all replaced, and the beading began. Several days and many hours later, the bodice was beaded, front and back. Here is a veiw of the front, partially beaded:

And here is the back veiw:


After finishing, with adding buttons at the back, and straps (a last minute addition; they came over the shoulder and made a 'V' at the back.), and a traditional bustle, she finally picked it up a couple weeks ago. And - I simply cannot believe these are the only pictures I got! Mom and bride promised me pictures later, of both mom in the dress in the 70's, and the current bride in the same dress. I will not only post them here, but I will also be framing them and putting them in my sewing studio!


Wednesday, March 13, 2013

Beautiful Nightmare

Prom season. That kind of says it all, doesn't it?

This year it's large jeweled beading, lots of chiffon and bright colors.
A new dress shop has opened in the area and has brought me more Prom business than ever! Which is good - I can't complain! In fact,I will soon be turning people away for the April Proms, as I simply have too many dresses and haven't room or time for  any more!

Today was one of those days - working on a prom dress - that I hate. Now, usually I love my work. Most of the time I love my work! But today . . .

I met with a very sweet and mature young lady yesterday, who brought me her prom dress that  she had paid for herself (and spent a very pretty penny on). Her prom is one of the earliest this year, in March. So, I knew I had to get it done quickly, to stay on schedule with all the other lovely ladies waiting in storage. I gave her a quote on the price and sent her on her way. I got the dress out this morning, planning to spend most of the day on it. Lots of that jeweled beading at the bodice, where it needed taking in, and lots of layered chiffon at the hem.


4 hours later I was still working on the beading. 


Once I started on the hem I got another surprise. I knew there was 3 layers; one of a lining, 2 chiffon. First, the lining. 6 yards around. 2 hours. Next, the first chiffon layer. 3 hours, 9 yards around. Last layer (finally!) of chiffon. Almost 4 hours - 15 yards!!! One layer - 15 yards!!!
I ran out of pins in working on it, had to raid another dress hanging in storage for more!

When all was said and done I spent over 12 hours on this dress, that I fully expected to take no more than 6.

A Beautiful Nightmare.

Saturday, February 9, 2013

Bead One, Sequin Two, Bead One, Sequin Two . . .

My bride wanted her mothers Vintage Gown re-made to look more modern for her May wedding. After removing the big puffy sleeves, reducing the volume of the skirt and adding a structured bodice lining, it was time to reattach the vintage lace and begin beading.


But first, It was necessary to sort through all my beads. She didn't want any silver or rhinestones, just clear, white and pearls. So I got busy . . .


Who knew there were so many different colors of pearls! I now have containers of white pearls, yellow pearls, ivory pearls, pink pearls, and even tan pearls!

After spending a good 5 or 6 hours sorting (yes, I had that many to go through with a tweezers, to separate), I finally got started beading the bodice. Here is what it looked like after 5 hours -


And here is another 5-6 hours later . . . .
FRONT BODICE
BACK BODICE
I just have to finish the beading on the front of the bodice and I will be done.  Probably another 6- 10 hours. The first few hours were killing my back, but I learned quickly to get up and stretch every 45 minutes or so! I am liking how it is turning out - I hope the bride does too!!

Thursday, February 7, 2013

A Vintage Re-Make

Last fall a lovely bride came to me with her mother's wedding gown from, well, lets just say, a certain era. That one that some of us remember better than others. Those big skirts, the big sleeves, lots of lace, and of course, the big hair!

The dress fit her quite well. if you could get around the big sleeves and skirt. Mom and daughter both had a pretty good idea of what they were looking for; remove the sleeves and make it strapless, reduce some of the fullness from the full gathered skirt, remove the lace 'tail' at the back, and maybe add some beading.

I had my bride put it on, leaving the sleeves off, so we could get a picture of how it might look.

Notice the gathering at the waistline; it made her look pretty bulky (and she's not), and the gathers at the back were even worse!


The first thing I did was to remove the sleeves, them take the skirt in at the sides; removing all the gathers at the front, and exchanging gathers at the back for pleats.


At her next fitting, the skirt fit perfectly, and we were ready to go ahead with re-creating then bodice. Being that it was made back in the 70's, it was made with no lining. I have found that in many dresses made in that era, this was the norm. Fascinating . . . 

Now it was time to make a lining for the bodice, with structure for the new strapless design.


Next up - beading!!!

Wednesday, February 6, 2013

Aplologies and A New Start!

Apologies, apologies, apologies. I had no idea it had been THAT long since I've posted a blog entry. All I can say in my defense is that 2012 was a VERY busy year! I usually have a month in the summer and atleast one more in the fall/winter that I can play catch - up and relax a bit. Never happened in 2012. I forgot how to relax, I forgot what I did in my spare time. If I wasn't sewing, I was trying to keep up with cleaning and laundry and just living. But no more! It is a new year and I have made a resolution to be more active on my blogging, and in my social life!

And on that little note, stay tuned for more blogging!